


Research and Planning
Web 2.0
- Facebook
At the start of the project, we made a Facebook group specifically for us to use as a means of communication. It allowed us to share ideas, images and documents needed throughout the course of the project with each other. Everyone had access to the group and was able to keep track of the project.
We found it really useful, because at the start of each week someone would post an agenda, stating what we want to accomplish by the week's end. It was a great tool to use for setting goals and helped us to all work towards the same objective.
There were times when one of us had made progress with the planning and needed feedback on it then and there. If we weren't together as a group, then they would post it and the others would give their thoughts.
- YouTube
We would constantly be on youtube during the research and planning stage, looking for ideas for our proposed music video. It served as a plentiful source of inspiration, allowing us to organise all of the videos we liked elements of into a playlist of our inspirations.
-Blogger
At this stage in the project, we were all still getting to understand the rest of our group's trail of thought. If you were to look at all of our individual research, while there were some very similar elements to each of our ideas, there were also some stark differences in the types of videos we each wanted to make. Blogger was really useful in finding out what we all did and didn't like in music videos, because we were able to see the directions each person wanted to take. Then allowing us to blend the various ideas together to a concept that we were all happy with, that emphasised the elements we all agreed on from the outset.
Mobile Phones
All of us in the group had some form of smart phone, which allowed us to make full use of these technologically converged and web 2.0 integrated devices. They gave us access to the Facebook chat, Whatsapp and Imessage groups, meaning that we were able to communicate with one another at the push of a button.


At the start of the project, we made a Facebook group specifically for us to use as a means of communication. It allowed us to share ideas, images and documents needed throughout the course of the project with each other. Everyone had access to the group and was able to keep track of the project.
 |
| Facebook Group |
 |
| Agenda set by Harry |
We found it really useful, because at the start of each week someone would post an agenda, stating what we want to accomplish by the week's end. It was a great tool to use for setting goals and helped us to all work towards the same objective.
 |
| Feedback via Facebook |
There were times when one of us had made progress with the planning and needed feedback on it then and there. If we weren't together as a group, then they would post it and the others would give their thoughts.
- YouTube
 |
| You Tube playlist |
We would constantly be on youtube during the research and planning stage, looking for ideas for our proposed music video. It served as a plentiful source of inspiration, allowing us to organise all of the videos we liked elements of into a playlist of our inspirations.
At this stage in the project, we were all still getting to understand the rest of our group's trail of thought. If you were to look at all of our individual research, while there were some very similar elements to each of our ideas, there were also some stark differences in the types of videos we each wanted to make. Blogger was really useful in finding out what we all did and didn't like in music videos, because we were able to see the directions each person wanted to take. Then allowing us to blend the various ideas together to a concept that we were all happy with, that emphasised the elements we all agreed on from the outset.
 |
| Posts on group member's blogs, showing video ideas |
Mobile Phones
All of us in the group had some form of smart phone, which allowed us to make full use of these technologically converged and web 2.0 integrated devices. They gave us access to the Facebook chat, Whatsapp and Imessage groups, meaning that we were able to communicate with one another at the push of a button.
Imessage chat (left), Whatsapp group (right)
They were especially useful when planning out different locations for shoots, allowing for us to make judgements on the suitability of the location by seeing images and videos of the location.

Image and video sent to group chat from mobile of locations
Construction: Production
Canon Legria HFG30
 |
| Legria HFG30 in use |
In the early stages of construction, we used the Canon Legria HFG30 for all of our location shots. It was perfect for the location shots because of it's portability and ease of use, which made shooting in crowded areas of central London very simple. Unfortunately, there were various piece of footage which we were unable to use do to the lighting we wanted for the shot. Many of our central London shots called for low key lighting, relying solely on natural and public lights (street lamps etc...), which the Legria didn't handle well, adding a large amount of grain into our footage; so much so that even upon editing, the quality was too low to use.
We also used it for the first couple of shots in our studio sessions, which although was a much better quality because of the controlled setting; it still lacked in quality when shooting our fire projection footage, due to low light levels. It is a shame, because overall it is a very good piece of kit, it just wasn't the most suitable choice for what we planned to do.
Go Pro
 |
| Go Pro in use |
We had planned a variety of slow motion shots and time lapses, the best option for us was to use the Go Pro, with it capable of shooting at a frame rate of 120 fps. There were some restrictions to it, such as the lack of zooming capabilities and it's interface not being the most practical, but we were able to get over these and capture stunning slow motion footage.
Canon 5D Mark 2
 |
| 5D Mark 2 in use |
The Canon 5D Mark 2 was our choice of camera for the majority of the construction stage as it shot in 1080p HD quality and allowed us to manually focus our shots. Admittedly, this did cause some shots to take that much longer because none of us were used to manually focusing a camera. It was a really useful piece of equipment, because it gave us total control of all photographs and footage taken. Even though we were apprehensive about using it, once our technician showed us how to adjust different settings, like the white balance and exposure, we made full use of these skills and took some high quality footage.
Projector
 |
| DIY Engineering used |
We were really keen to make full use of fire projections in our footage because of the meaning it adds to our performance shots, meaning we needed to use a projector to not only create the effect.There was some hesitation with this, because the projection would have to be the sole source of light in the shot, or else the fire would become unclear. All things considered, with the help of our technician, we were able to find a really good medium between the brightness of the shot and how clear the image appears. There was some DIY engineering needed in order to get various compositions, because of the limitations of using a projector and it did take up quite a bit of our studio time, but it's all a learning experience.
Lighting Desk
 |
| Harry programming in our pre-sets |
While the lights were quite enjoyable to take control of, this was the most time consuming element in our shoot. On one occasion, it took us nearly 2 hours to set-up the lighting because the studio was in constant use by other groups. Although very laborious at first, it is just a matter of experience and this set-up time decreased rapidly once we grasped what lighting positions were required for each effect.
Construction: Post-Production
Premier Pro
When editing our collected footage together, Premier Pro was our first port of call. While this wasn't our first experience using the software, as we had all previously used it for coursework, some in our group were much less confident using it than others. Due to it allowing for non-linear editing and it's multi-track layout, it was the perfect piece of software for the job, allowing us to continually make adjustments to the sequence and have total freedom with our creative decisions.
 |
| Multi-track, non-linear editing |
 |
| Cross Dissolve effect |
 |
| Grading in Premier Pro |
After Effects
Our use of After Effects was kept to a minimum for the simple fact that it wasn't suitable for the vast majority of our footage. We did however make use of it when grading our Silhouette performance shots, because Premier Pro didn't allow us to alter the image to the extent required. While I did have some prior experience using After Effects, Harry and Yssy took charge of grading using After Effects, because our technician walked them through using "Colour Finesse".
Photoshop

Everyone in my group had some prior experience using Photoshop, both during and outside of the media course, so while there were some elements that were new to us, there were no issues when it came to editing the promotional shots, creating our digipak and making images and specific elements needed for our website. My use of Photoshop was predominantly linked with the creation of our digipak and merchandise for our website. One thing which none of us had experience with, but was of great help, was the skin smoother pre-set. This was programmed by our technician and therefore not standard on Photoshop, so we were talked through how to use this effect. In many of the close-up images, imperfections in the skin were accentuated and made even more noticeable; this allowed us to rectify these imperfections and "smooth" out the skin, as the name suggests.
Web 2.0
- Wix
Our use of After Effects was kept to a minimum for the simple fact that it wasn't suitable for the vast majority of our footage. We did however make use of it when grading our Silhouette performance shots, because Premier Pro didn't allow us to alter the image to the extent required. While I did have some prior experience using After Effects, Harry and Yssy took charge of grading using After Effects, because our technician walked them through using "Colour Finesse".
 |
| After Effects full interface |
Photoshop
Everyone in my group had some prior experience using Photoshop, both during and outside of the media course, so while there were some elements that were new to us, there were no issues when it came to editing the promotional shots, creating our digipak and making images and specific elements needed for our website. My use of Photoshop was predominantly linked with the creation of our digipak and merchandise for our website. One thing which none of us had experience with, but was of great help, was the skin smoother pre-set. This was programmed by our technician and therefore not standard on Photoshop, so we were talked through how to use this effect. In many of the close-up images, imperfections in the skin were accentuated and made even more noticeable; this allowed us to rectify these imperfections and "smooth" out the skin, as the name suggests.
Web 2.0
- Wix
Wix was used when creating our website. Wix is a free web-based website makes, which allowed us to design and publish our website for our artist, Roza. Matt was mainly responsible for our website, however there were various occasions when we could all be working on Wix as a group. Using Wix we created various pages on our website, each serving a different purpose and encouraging audience interaction.
 |
| Header with links to different pages on website |
 |
| Twitter feed on website |
Wix's downfall is the fact that we don't have the freedom of creating java based animations as it isn't compatible, as well as the formatting of website made on Wix being slightly "clunky". While we are able to move objects around on the page fairly freely, it is a nightmare getting the header and footer to the correct proportions.
With the proliferation of technologically converged portable devices, audiences are capable of accessing social media platforms anytime and anywhere. Due to this fact, it was a no-brainer for our group to create an account for Roza on one of the most globally popular social networks, Twitter. Roza's twitter account serves as a direct link between audiences and the artist, giving live updates on the star's current activities and goings-on. Roza's twitter account links directly to our website, having a live feed on one of the pages. Therefore serving two purposes; building a bridge between audience and artist; and encouraging audiences to become more involved with the artist by visiting the website.
 |
| Roza's Twitter Page |
 |
| Roza's Instagram Page |
Being a teenager myself, I am fully aware of and interact with the public sharing of images via the social networking website, Instagram. There has been a move from text based communication to a non-verbal conversation which is purely driven by visuals. Roza's Instagram page acts as another voice for the artist, by which the audience are able to learn about and connect with Roza as a person. We were constantly updating the Instagram page with exclusive behind the scenes images and never before seen images of Roza in setting other than in a studio.
Evaluation
Web 2.0
- Prezi
- Prezi
 |
| Using Prezi to create a presentation |
-Blogger
 |
| Using Blogger to answer evaluation questions |
Blogger has been at the centre of this project, showing the various decisions made throughout and demonstrating how these were affected by my understanding of the music industry. In the evaluation stage of the project, Blogger has been used to convey my responses to the various evaluation questions and tie them in with the rest of my project by embedding elements of work from other websites. Without Blogger, I wouldn't have a suitable platform to display my work throughout and show my thinking process. Although Blogger has been a great asset to my project, it hasn't been easy to format my work in the way I want, often having to settle for large gaps in my work, rather than having it as organised as I would have wanted.
- Padlet
Padlet is just one of the web tools used in my evaluation to present information in an interactive and interesting way.
 |
| Use of Padlet in evaluation |
- Imgflip
Imgflip is an online youtube to gif converter. I used it to make my blog very visual, giving short clips that can be used to express the points in my evaluation answers.
-Survey Monkey
Survey Monkey is a web-based surveying website, which allows us to create and distribute custom made surveys onto different social platforms. When gathering audience feedback, it was essential that we heard the opinions of as many people as possible, in order to get an image which is representative of people's true opinion on our music video. We made a survey of 10 questions to try and gauge the public's views, with questions like "How old are you?" to figure out the demographic of people responding to the survey and "What genre of music do you think this music video is for?" to see their views. Our survey can be seen below:
Create your free online surveys with SurveyMonkey , the world's leading questionnaire tool.
-Cannon Legria HFG30
Collecting feedback from audiences was a big part of the evaluation process, asking people's opinions and making conclusions based on those opinions. To do this, we recorded their responses to set questions using the Legria FG30; which made the whole process really easy transferring all of the footage to a computer to be edited, due to it being digitally integrated.
-Premier Pro
Once we collected all of the footage, we then used Premier Pro and its non-linear editing capabilities to edit together a collective audience feedback video. This made it easy for us to find general trends in any audience feedback and get a clear image of people's views.
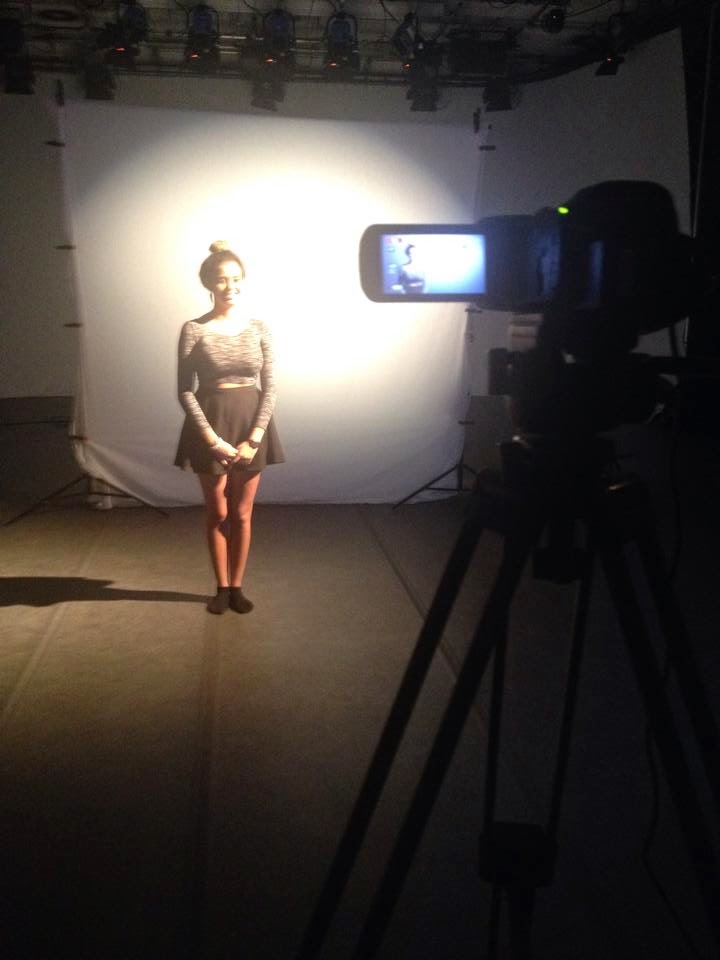
-Cannon Legria HFG30
.JPG) |
| Filming feedback |
Collecting feedback from audiences was a big part of the evaluation process, asking people's opinions and making conclusions based on those opinions. To do this, we recorded their responses to set questions using the Legria FG30; which made the whole process really easy transferring all of the footage to a computer to be edited, due to it being digitally integrated.
-Premier Pro
Once we collected all of the footage, we then used Premier Pro and its non-linear editing capabilities to edit together a collective audience feedback video. This made it easy for us to find general trends in any audience feedback and get a clear image of people's views.
No comments:
Post a Comment